
Home/Installation
European Interior Door Installation.
No nails. No holes to fill. Our European doors are fastened with low-expansion foam for a clean, strong and precise result.
Installed without nails, and without compromise.
European interior doors are designed to be installed without the use of any nails. And no high quality product should be visually diminished by holes that need to be filled afterwards.
So how are the doors fastened in place?
Through the use of low-expansion foam between door frame and wall framing you can avoid the use of nails and, at the same time, achieve a structurally strong installation.
Here are the installation steps
Ten steps from the box to a finished door. Photos show the key steps.
-
1
Assemble the frame
Remove the door frames from their packaging and glue the 2 jambs to the header piece.
-
2
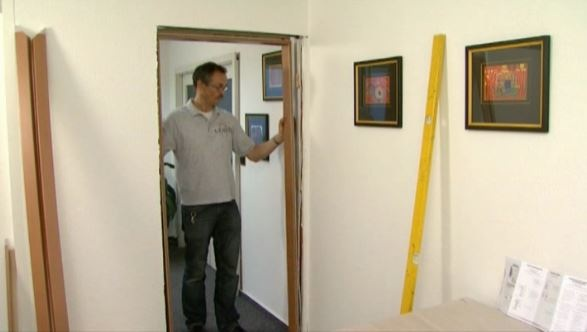
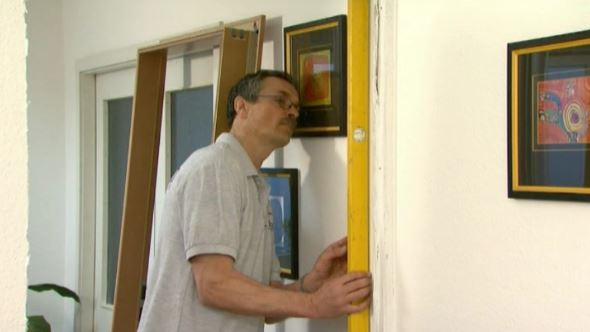
Insert and shim the frame
Insert the completed frame into the door opening and shim it plumb and level with wood or PVC shims (see pictures).
-
3
Install the hinges and strike plate
Install the hinges and strike plate.
-
4
Install the mortise lock
Remove the door panel from its packaging and install the mortise lock.
-
5
Hang the door and check the gaps
Hang the door to make sure all the gaps between frame and door panel are equal in distance.
-
6
Foam the frame
Remove the door slab. Attach spreader bars (see picture) and use low-expansion foam around the perimeter of the door frame (see picture). Let it dry completely before cutting excess foam off.
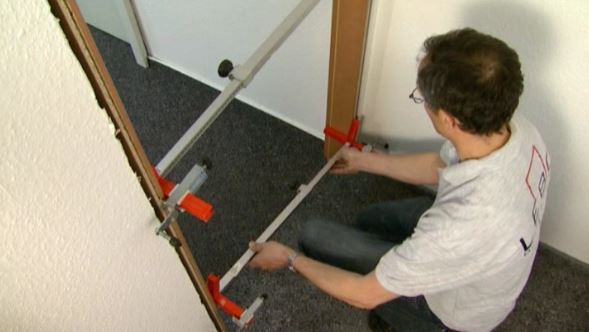
Spreader bars 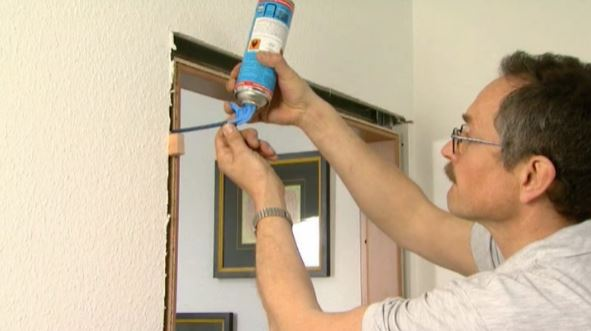
Low-expansion foam -
7
Re-hang the door panel
Re-hang the door panel.
-
8
Install the trims
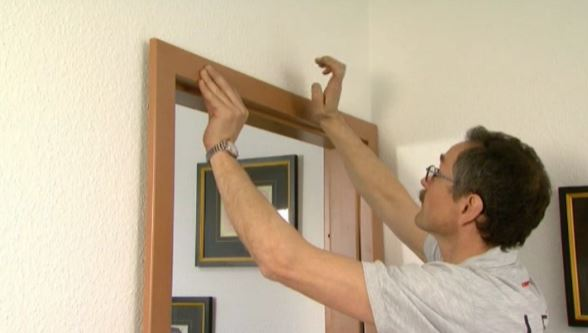
Remove the trims from the packaging and cut to the desired length. Verticals go through and the top piece sits in between (normal installation). Push the trim into the frame grooves. There is no need for glue or nails, but you have the option of fastening the trims to the drywall for extra strength if needed.
-
9
Test the door
Make sure the door opens smoothly and does not swing open or closed by itself. Check that the latch engages the strike.
- 10
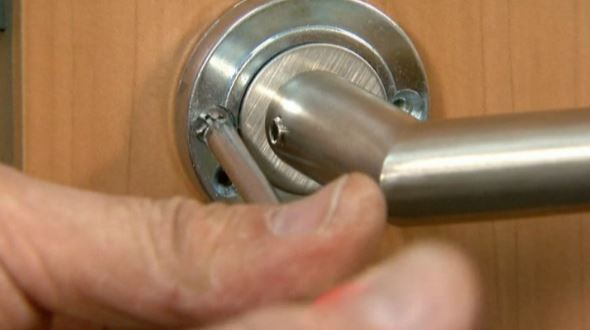

Our interior door installation provides these benefits
Foam Installation
The benefit is sound and heat transfer reduction while maintaining a firm structural install without nails or screws.
Adjustable Hinges
The benefit is easy height and width adjustments through turning of the slim-line hinges.
Adjustable Trims
The benefit is increased flexibility of frame depth when dealing with out-of-plumb walls and uneven drywall.
Talk to a door specialist
before you install.
We ship across Canada and the USA and have installed our own doors throughout Vancouver, BC.